Smartrak enhanced our Pool Booking application to better suit our customers customer's mobile workforce. The Mobile Pool Booking website was created to provide limited (but continually evolving) functionality. This document , provides a high-level guide to the current release of the mobile website, which will interact with the same bookings the current Pool Booking system accesses – so a mobile user can view the bookings that have been made through the standard Pool Booking system.
The website is accessible from any internet-capable mobile device through a mobile web browser. There is no application to install, just connect to the site through: https://booking.smartrak.co.nz or https://booking.smartrak.com.au
Mobile Pool Booking User Guide -
| View file | ||
|---|---|---|
|
Mobile Pool Booking User Guide Topics | |
|---|---|
|
| Info |
|---|
Device Compatibility StatementMobile Pool Booking fully supports the latest two major versions of Safari and Chrome for iOS and Android phones and tablets, and Microsoft Edge for Windows phones and tablets. |
Logging In
| |||||||
| |||||||
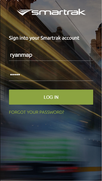 | 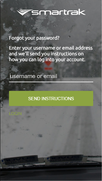 | ||||||
Viewing Bookings List
| |||||||
| |||||||
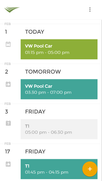 |  | ||||||
|
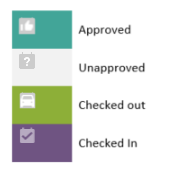
Viewing Booking Details
| |||||||
| |||||||
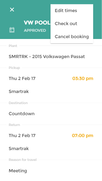 Figure 1: Approved | 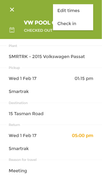 Figure 2: Checked Out | ||||||
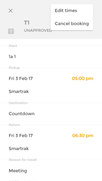 Figure 3: Unapproved | 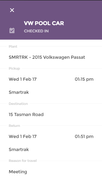 Figure 4: Checked In | ||||||
Performing Booking Actions
| |||||||
Cancel - the booking will be cancelled with the following message. You will be returned to the bookings page, where the cancelled booking will be removed. |  | ||||||
Check Out - The booking will update to being checked out, you will get the following message. | 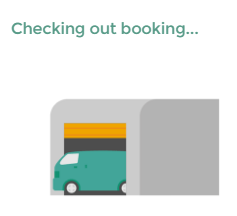 | ||||||
Check In - When the booking is checked out, you can check it in, you will get the following message. | 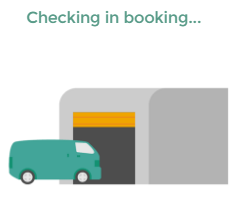 | ||||||
Editing a Booking
| |||||||
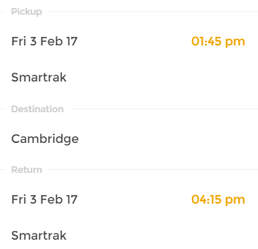
Currently users are limited to only be able to edit the start and end time of bookings. Editing Booking Times If you are the driver or a passenger who is also a booking administrator, you will see the Edit times menu option. Additionally, you will see the booking time (s) in orange if it is editable. This could be the Pickup time and/or the return time. Note: You can only change pickup times when the booking is not checked out. You cannot change pick up or return times when a booking is checked in. Selecting an editable orange time, or selecting Edit Times from the menu will show the following message whist the available times to move the booking to are checked. A booking time can only be adjusted to when all the following conditions are met: - The plant it available (based on other bookings or restricted driving times) - The driver is available - Passengers are available - Additional plant is available Any period that is unavailable (due to the failure of one of more of the conditions above) will be shown as a greyed out block in the time edit screen. The time editing screen will either show the start of the booking, the end of the booking, or if the booking is small enough the entire booking | |||||||
 Figure 5: Editing booking time screen | A Current booking time (updates if the time is adjusted) B The current booking date range (maybe a single day) C The booking block D Pickup start time E Return time F Non-available slots G Edit time toggle H Confirm changed time I Cancel editing time | ||||||
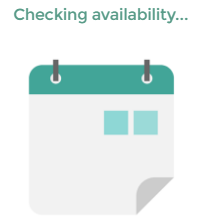
Selecting the Edit time toggle button The screen will adjust showing available slots (in bordered 15 minute slots) where the booking time can be moved to. The booking can be adjusted to one of the slots shown, or in to the current booking slot (in green) to pick up later or return earlier. This is indicated by the red arrow in the screen shot below. Simply tap the new time to change the booking time. Non available lots that are shaded in grey will have question mark which when pressed, will inform you of the reason the slot is unavailable. For a booking that covers multiple dates, the new date can be scrolled to, or the day (B in the above image) can be selected to auto-scroll to that day. | 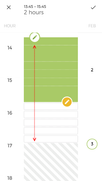 Figure 6: Editable return time range | ||||||
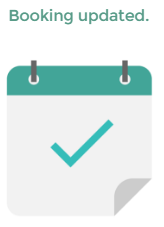
To save the change in time(s) select the top right confirmation tick. A check will be made to ensure the change is still valid (in case any other impacting changes were made in the background). Once confirmed, a booking confirmed dialogue will show before returning to the booking detail screen. |
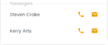
Figure 7: Edit time confirmations | ||||||
Creating a Booking
| |||||||
New bookings can be created from the initial main Booking List screen by selecting the A wizard will then be presented to guide you through the booking creation process. Depending on your company setup, you may not be required to perform some of the steps below. You can cancel a create booking anytime from the menu At any point you can navigate back to a previous step with Any step that has | |||||||


1. SELECT START DATE
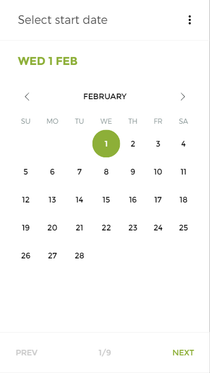

Select the date you wish the booking to start from.
2. SPECIFY BOOKING LENGTH

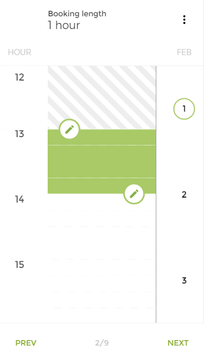
Select the pencil edit icon and select the start then end time for the booking. The date can be changed by selecting the date on the right.
3. SELECT PICK UP LOCATION
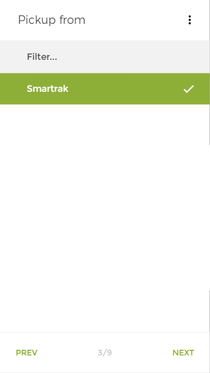

Choose one of the pick-up locations where your company’s plant can be booked from.
4. SELECT DESTINATION LOCATION

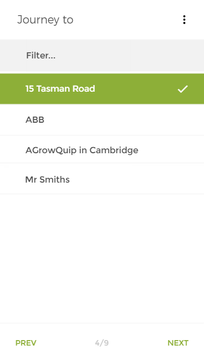
Choose a destination location you are travelling to from the list.
5. SELECT PLANT TYPE (OPTIONAL)
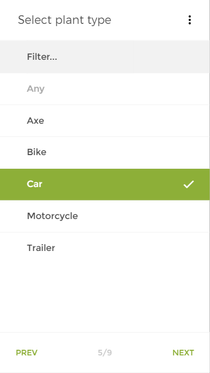
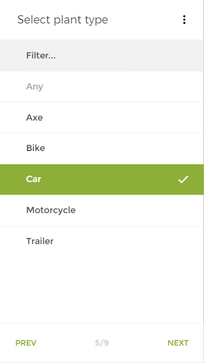
Select the plant type. If you only have one plant type, you will not see this step.
6. SELECT AVAILABLE PLANT

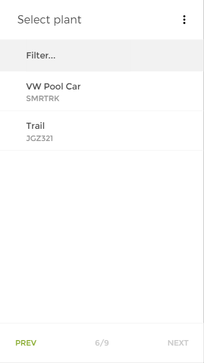
You then select an available plant that matches your criteria.
7. SELECT COST CENTRE (OPTIONAL)
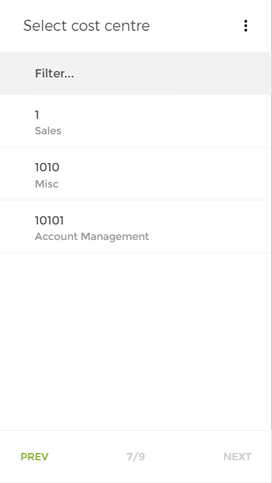
If required by your company, select the cost centre for your trip (only a single cost centre is allowed).
8. SELECT TRAVEL REASON
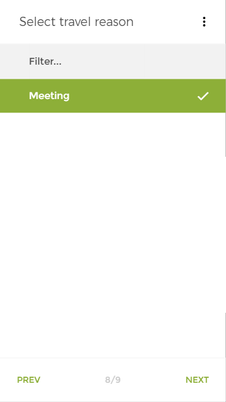
Select the travel reason. If setup, this includes entering a custom 'Other' reason.
9. ADDITIONAL OPTIONS
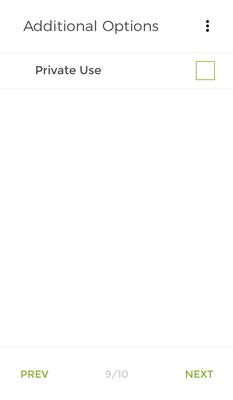
If booking is for Private Use, select tick box
10. CONFIRM BOOKING
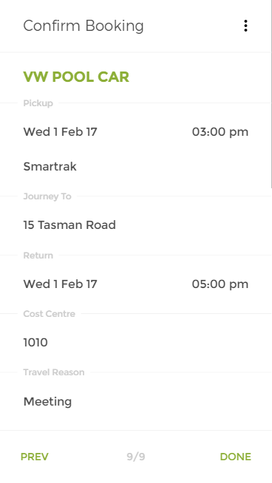
The final screen provides a summary of the booking. To confirm select 
Saving Mobile Pool Booking to Home Screen
| ||||||
Mobile Pool Booking is a website that runs on any internet capable mobile device, requiring a connection to the internet to access the Smartrak Pool Booking system. The website can be run directly off a device home screen without entering the URL in a mobile web browser. Accessing the site via the home screen will not only give quick access to the site, but will have the look and feel of a mobile application. To save to your device home screen, follow the instructions below for the specific device. Some browsers will allow you to set an auto fill option to allow you to save your username and password - removing the need to enter in the username and password every time. For Apple iOSLaunch the web browser on Apple’s iOS (Safari only) and navigate to the website or web page you want to add to your home screen. Tap the Share button on the browser’s toolbar — that’s the rectangle with an arrow pointing upward. It’s on the bar at the top of the screen on an iPad, and on the bar at the bottom of the screen on an iPhone or iPod Touch. Tap the ‘Add to Home Screen’ icon in the Share menu. You’ll be prompted to name the shortcut before tapping the Add button. The shortcut can be dragged around and placed anywhere, including in app folders — just like a normal app icon. 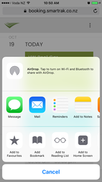 | ||||||
For AndroidLaunch Chrome for Android and open the website or web page you want to pin to your home screen. Tap the menu button and tap ‘Add to homescreen’. You’ll be able to enter a name for the shortcut and then Chrome will add it to your home screen.  For WindowsThe. First, open the website you want to pin in Internet Explorer. Tap the More (…) button and tap ‘Pin to Start’ in the menu that appears. 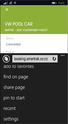 | ||||||
Using Autofill to Save Username and Password
| ||||||
For Apple SafariUnder the device settings, find the Safari option. From there, select the AutoFill option and enable Names and Passwords.  For ChromeSelect the menu in Chrome, select settings and enable “Autofill forms”. 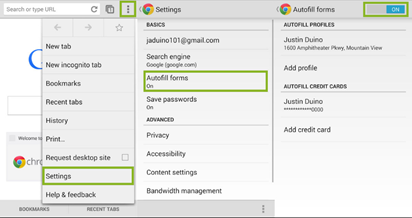 For WindowsSelect the (…) button from the bottom of the Microsoft browser and select “Settings”. From the next screen select “View Advanced Settings”. There you will see the option to enable the “Offer to save passwords” which will allow you to save username and passwords for websites. 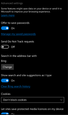 |
Caveats / Limitations |
|---|
Creating a booking through the mobile site has some limitations:
|
Self Help | Service Desk | Service Desk Help | Knowledge Base | Trouble shooting